Installation Instructions for MacOS
This document will walk you through the steps you need to perform to install and configure Jupyter Lab, the development software you will use for CS220. You need to perform 5 steps:
- Download and install Anaconda
- Change the Python version
- Enable the debugger
- Associate notebook files with Jupyter lab
- Test your configuration
1. Download and install Anaconda
Anaconda is a suite of software programs used for data science. In a browser go to Anaconda's download page https://www.anaconda.com/download/ to download the software. You can either provide an email address and click the submit button or click the Skip registration to bypass providing your email.
On the download page, it should have detected your operating system and provided a link at the top of the page for the proper version. You will need to know if your computer is an Apple Silicon or Intel chip. If you click on the apple logo in the top left corner of your screen and select "About this Mac" a window will show you either the Chip type (Apple) or the Processor type (Intel) of your computer.

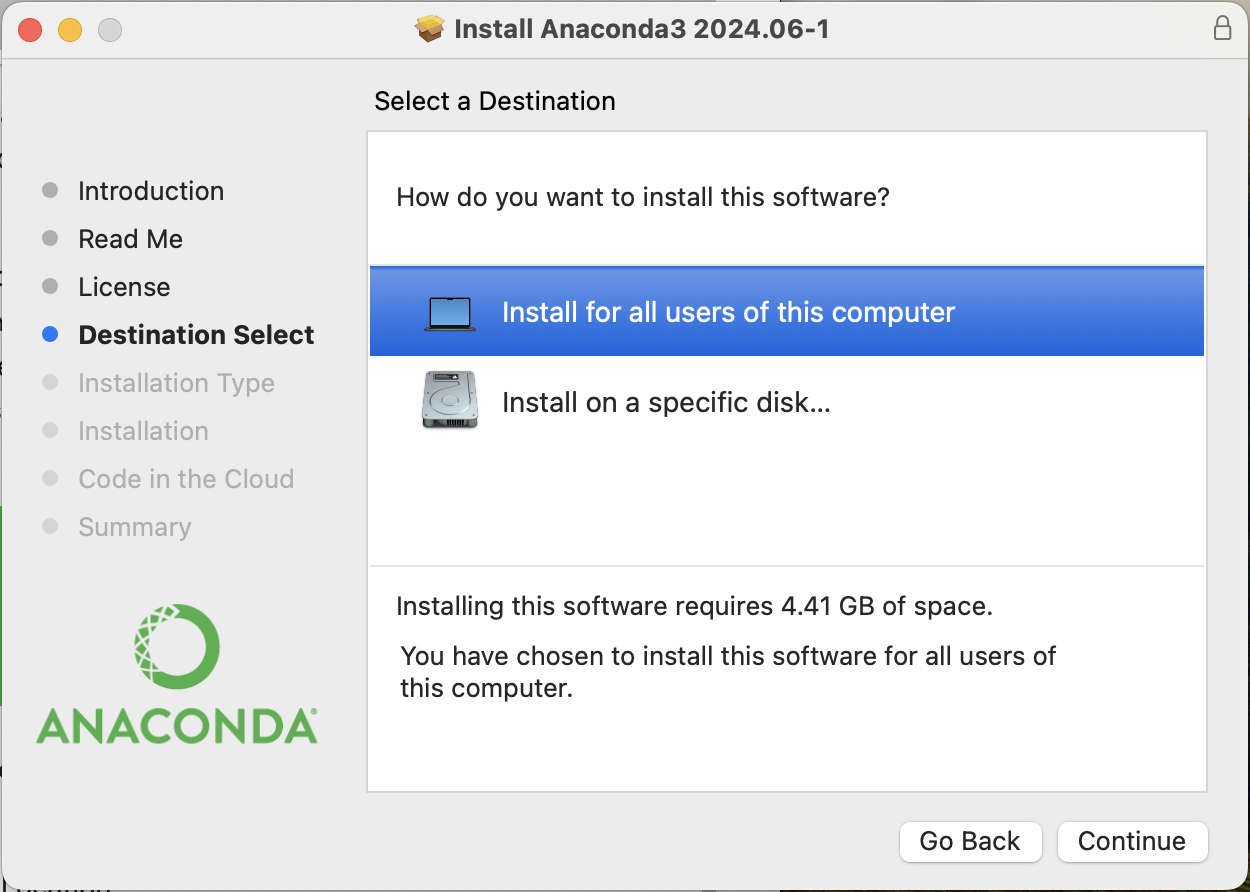
Download and run the installer, following the instructions. On the "Select a Destination:" page select "Install for all users of this computer" and finish running the installer.
2a. Change Python version
You will be submitting your code to our grader, which is running a slightly older version of Python, version 3.10.12. So you need to make sure you are running the same version on your computer. Click on the Launchpad logo  and find and click on the other group
  and then on the terminal
 ![]() to open a program where you can type commands. In the terminal window, type the command
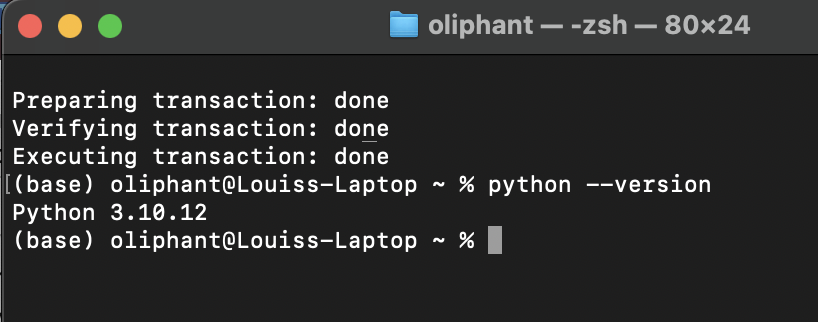
to open a program where you can type commands. In the terminal window, type the command conda install python=3.10.12 and press enter. Follow the instructions to have it proceed and install that version of Python. When it is finished you can check that it has installed the proper version by typing python --version and then exit terminal.
2b. Install ipylab
Next, we will have you run one more command in the Terminal to install ipylab, which is a package that will help us work with JupyterLab. In the Terminal, type in the following command and hit Enter, following any instructions to install if prompted.
conda install conda-forge::ipylab
3. Enable the debugger
One feature of Jupyter Lab that we will use this semester is the debugger. It is disabled by default. To enable it you will need to edit a text file. Start by opening the finder
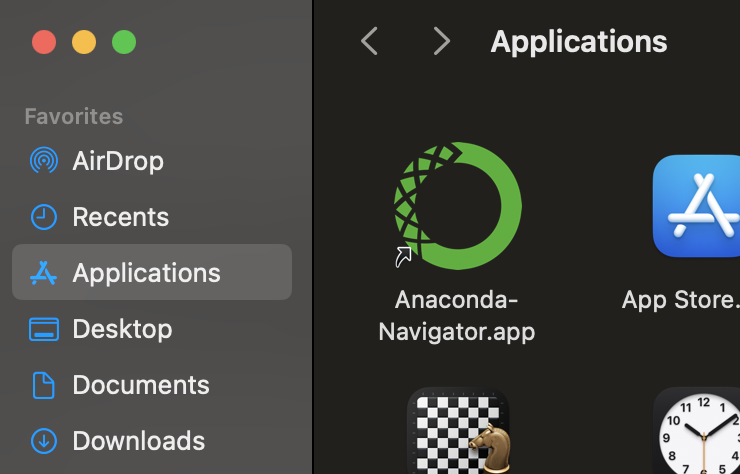
 and in the sidebar, click on Applications. Anaconda Navigator will be one of the applications listed.
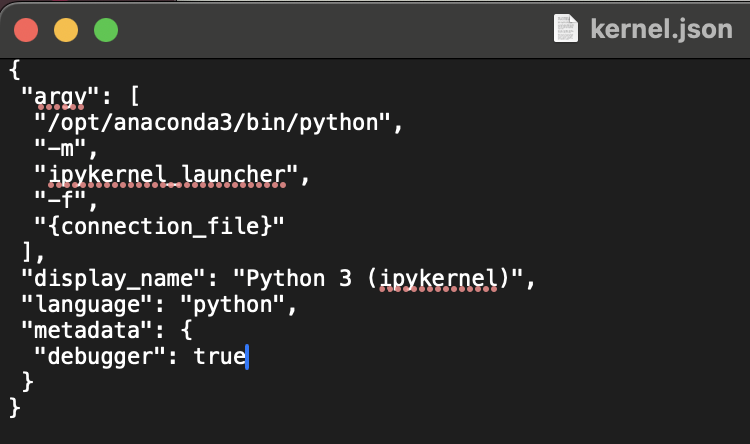
Now control-click on the Anaconda Navigator logo and select "show original" in the pop-up menu. Browse inside the anaconda3 folder to the share\jupyter\kernels\python3\ folder and double click to open the kernel.json file in TextEdit.
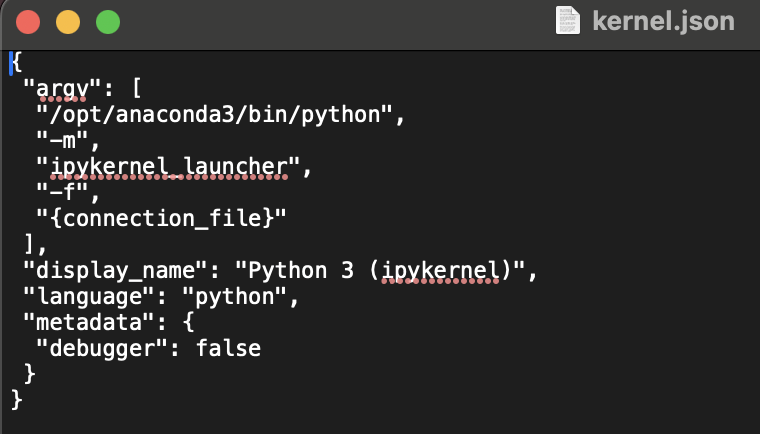
The line that reads "debugger": false needs to be changed to be "debugger": true and then save the file.
4. Associate Notebook Files with Jupyter Lab
The files that we will be working with this semester are called Jupyter Notebook files. These files have a file extension of .ipynb. These files can only be opened by certain applications, such as JupyterLab, so we will show you how to open JupyterLab using the Anaconda Navigator you have just installed.
The first thing to do is to open the Anaconda Navigator. The easiet way to do this is to go to the Finder again . and in the sidebar, click on Applications. Anaconda Navigator will be one of the applications listed, double click on the icon to open the navigator.
Note: You can also drag the Anaconda Navigator icon into the Dock strip for easy access in the futute.

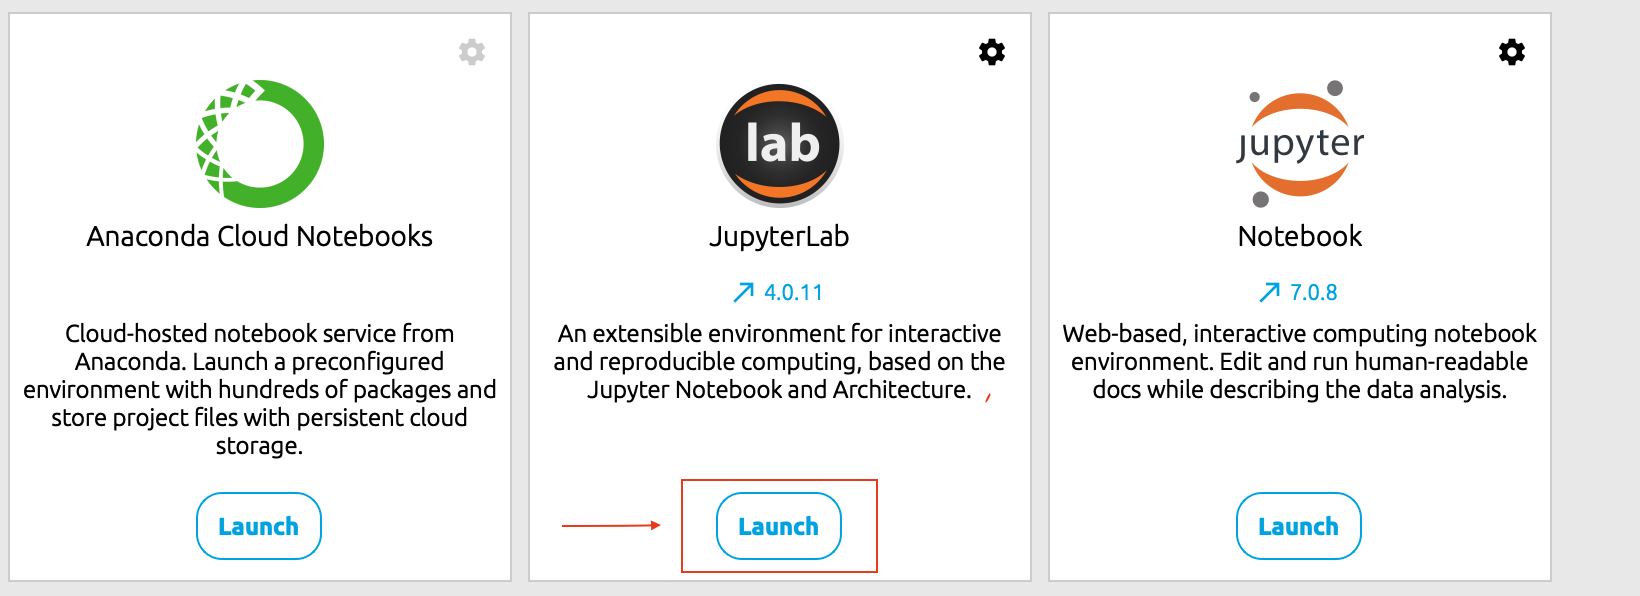
Once the navigator is open (it make take a few seconds to boot up), scroll until you find the JupyterLab icon and click the "Launch" button below it. Make you you launch JupyterLab, not Notebook.
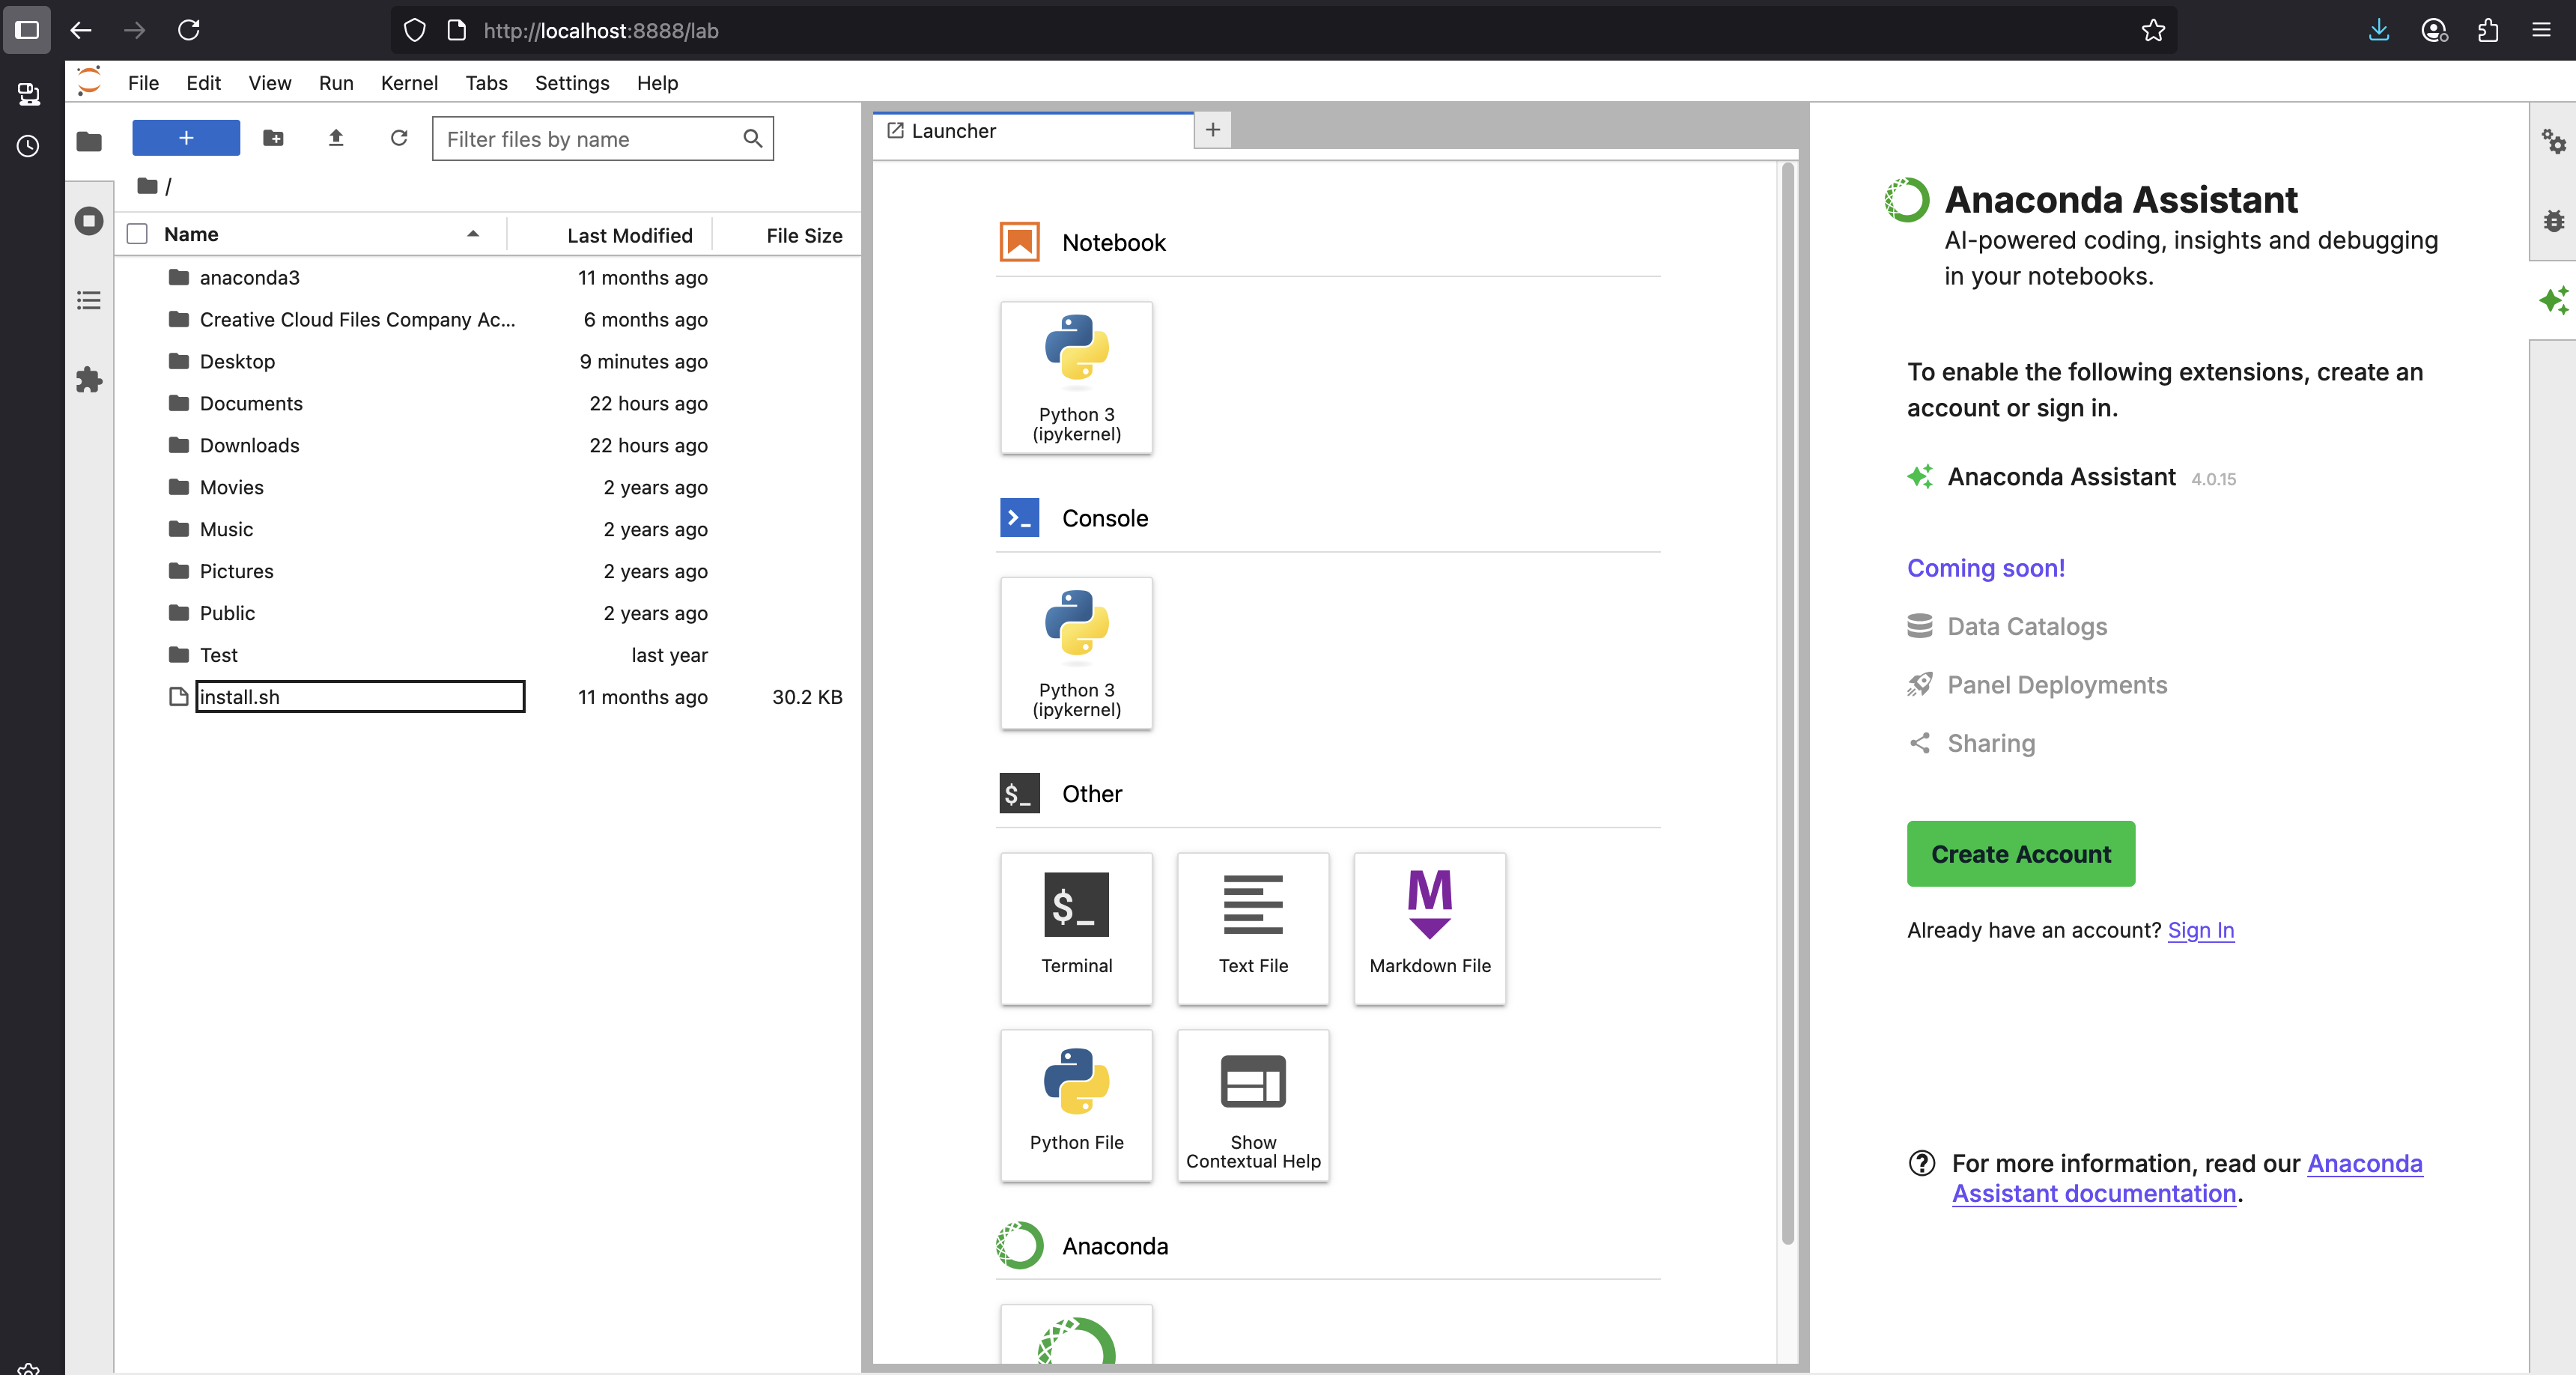
If Anaconda is installed correctly, JupyterLab will open an interactive window directly in your default browser. It is recommended to use either Safari or Firefox. You can use the files sidebar on the left side to navigate to the files you want to open.
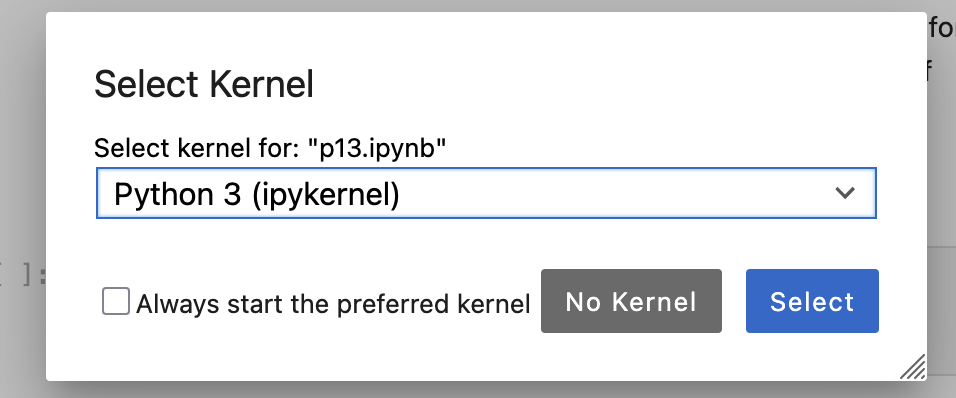
Later on when you open up the project files, you may be asked to choice a "kernel" for the Jupyter Notebook you are working in. Just use the dropdown menu to choose Python 3 (ipykernel)
5. FAQ
1) I tried to install anaconda and it says /opt/anaconda3 already exist.
This usually happens when you tried to uninstall anaconda and install it again, but now /opt/anaconda3 is not being deleted when you uninstalled anaconda. To resolve this issue, in the terminal, type "cd /opt" and press Enter. Then type "ls" and press Enter. You should see a folder named "anaconda3" listed. Finally, type "sudo rm -rf anaconda3" and press enter, mac will asked for your password. After typed in your password and press Enter, you will delete the old anaconda3 folder. Now you should be able to install anaconda3.
2) What's the difference between JupyterLab and Notebook in Anaconda?
Both JupyterLab and Notebook will open interactive pages in your browser where you can work with Jupyter Notebook (.ipynb) files. However, JupyterLab has more functionality that is useful for writing and debugging programs, and is what we will be using in this course.